Printing Windows
Printing is available in most StreetSmart Pro®
windows, including the ability to customize your printouts with headers,
footers, grid lines, and more.
Customizing Window Printing
In windows with the Print feature, click File
> Page Setup to begin customizing your print job.
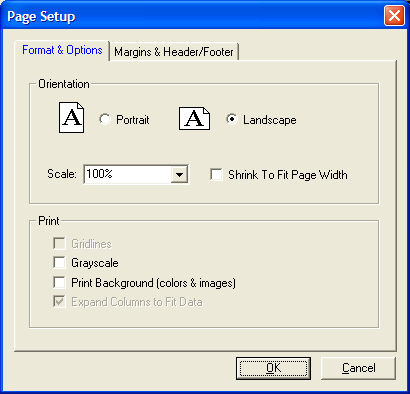
- Select a Portrait
or Landscape
orientation. For wider windows, like charts, Watch Lists, etc., landscape
may be the better choice to fit all the content on one page width.
TIPS:
- If
the window contents still do not fit on the page, you may, in some windows
with this feature, be able to choose to Scale
the printing to a lower percentage or click Shrink
To Fit Page Width for the printer to automatically scale the page
to fit.
- You
can also go to Settings
> Fonts for the window you are printing and enlarge or reduce
the font size to change how the window prints.
- Next, set up the qualities of your print job (only
applicable choices will be available):
- Gridlines:
For windows where information is presented in a table format, check this
box to keep the lines visible in the printout.
- Greyscale:
Check to print in shades of grey/black/white. Note
that for some printers, you will have to change this setting in your printer
properties for it to take effect. In the File
> Print window, select Properties
and find the setting for Greyscale
and select it. The location of this setting will vary depending on the
printer you use.
- Print Background
(colors & images): If checked, the printout will look exactly
like what you have on the screen. So if you print a chart with a black
background, it will print with a black background.
If unchecked, it would print with a white background and white
text would print black.
- Expand Columns
to Fit Data: If checked, printouts involving columns of data, such
as Watch Lists, will print with the full heading of the column showing.
If unchecked, the columns will be the same width as they are on
the screen and column names may be partially hidden.
- To adjust the Margins and the Header and Footer
content of the printed page, click the Margins
& Header/Footer tab.
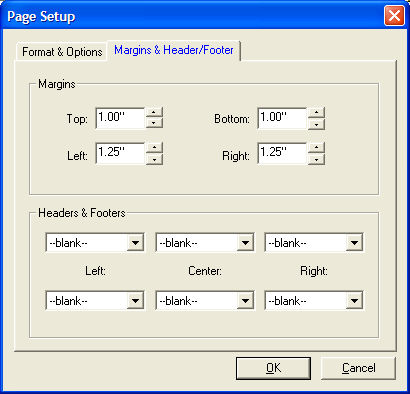
- Decreasing the size of the Margins
may help fit more data onto a page without having to shrink the size of
the data, thus keeping it more readable. Use the up/down arrows to adjust
the margin size on each edge of the page.
- If you wish to apply Header and/or Footer data
to your page, select the data you wish to display from the drop-down lists
in the Headers & Footers panel. The items you choose in the top row
will be at the top of the page in the Left/Center/Right positions, and
the bottom row selections will appear at the bottom of the page.
Choose either the provided fields, such as Tab Name, Date & Time,
Account Number, etc. or choose Custom...
and enter your own header or footer content.
When you are finished customizing your print job, go to File
> Print and click OK
when you are ready to send the page(s) to the printer.
Copyright ©Charles Schwab & Co., Inc.
2011. All rights reserved. Member SIPC.
(0411-2708)